-
01
How To Take a Screenshot on Windows 10
One of the most widely used operating systems worldwide, Windows has a variety of methods to capture a screenshot of whatever you are looking at. The easiest method is straight off of the keyboard.
Windows 7 and 8
PrtScn

You can simply click the Print Screen button on the keyboard, seen as PrtScn above.
Then the image is copied to your clipboard. The easiest way to save it would be to open up Paint or Photoshop and Paste the image.
Windows 10
Windows Key + PrtScn or PrtScn


There is a neat little feature for Windows 10 that allows you to instantly save Screenshots to your Pictures folder, by clicking Win + PrtScn together. It will be saved in the Pictures folder under the heading Screenshots in the personal user folder c:/Users/Your username/Pictures/Screenshots .
You can still use the regular PrtScn as you usually would, but this is a nice and quick way to save images.
Screenshot selection from screen

Windows Key + Shift + S
If you just want to select a piece of the desktop, this neat little shortcut will allow you to do just that, as long as you have the Creators Update (you do if you aren't living in 2018). This works the same as PrtScn does, in that you must copy the selection to some sort of image editor, so you can save it as its own file.
If you're still having trouble, and just can't seem to get the hang of it, this YouTube guide will answer all your questions and then some.
Alternate Advanced Method for Screenshots - Game Bar

Middle Button on Game Bar

If you want something beyond your keyboard, Windows 10 has a number of features designed for gaming, but can easily be re-appropriated for your benign use. The Game Bar has a screen capture function that allows you to capture a recording, or a screenshot of the game you are playing. However, this can be used to screenshot an application, as long as you have designated that it is a game when the pop up box appears in the Game Bar settings. These will be saved in the folder C:\Users\[your username]\Videos\Captures.
-
02
How To Take a Screenshot with Android

Android is one of the most flexible mobile OS options on the market, and its no surprise it is constantly vying for first place in the market with Apple.
Option 1 - Android Devices with and After Ice Cream Sandwich (4.0+)

Android has a pretty straightforward method to grabbing screenshots of your phone. On some older generation Android devices, clicking the Home and Power/Lock Buttons together would save a screenshot.
Option 2 - Android devices with and after Ice Cream Sandwich (4.0+)

Other newer devices now have changed the button pairing to the Volume Down and Power/Lock Buttons together, and the device will instantly save the screenshot to your Image Gallery,, in the folder labeled Screenshots.
Some of these phones have various features built into the phone, that allow you to immediately upload, or share the screenshot to a wide variety of platforms and storage options. Make sure to check your device to see if there are any such options.
Option 3 - Buy a new phone method Android 2.3 and below
Option 3 involves a bit of work, so if you have reached this point, the best advice would be to update your phone to something of this decade. If you are staunchly opposed to getting rid of your first generation android phone, you can root the device in order to add several aftermarket options such as Screenshot UX, which offers several methods of screen capture. If you haven't rooted your device, or cant, No Root Screenshot It.
Thanks to Geek Easier and LifeHacker for the in-depth guides and way more information than we could possibly put in this post (tone it down a bit guys).
-
03
How To Take a Screenshot On An iPhone
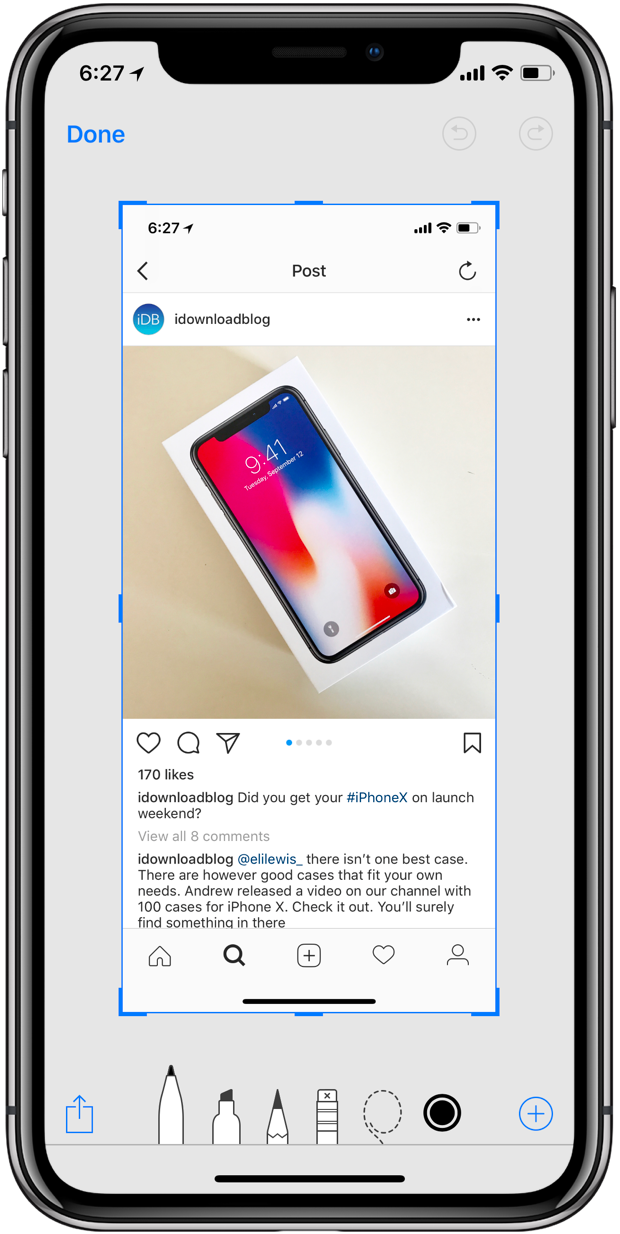
iPhone X/XS/XS Max/XZR


For newer iPhone models, it is as simple as pressing the right Side button along with Volume Up, and the screen will flash white and make a camera shutter sound. A small icon of the screenshot will pop up in the bottom left corner, and clicking on it will allow you to draw on it or add text instantly using the Markup tool.
iPhone 8 or earlier models of the iPad and iPod Touch

For older models (iPhone 8 and below), clicking the Power/Lock Button together with the Home Button, it will save the image. However, only phones that are able to run the iOS 11.3 at least will be able to see the screenshot preview.
For Everything iPhone and more, there is no better place than iMore or check out this perfect how to video from Touch Technology Review.
-
04
How To Take a Screenshot On Apple OS
Capture a full screenshot and save it to your clipboard
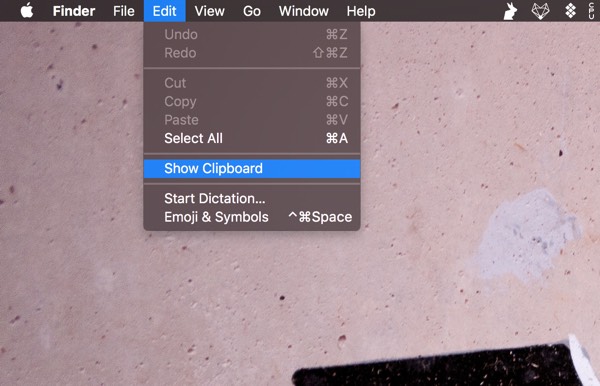
Command + Control + Shift + 3
This method is the classic one, and similar to Windows, it copies the image to your clipboard, which you can access through the Clipboard. In order to access your latest screenshots and go to Edit on the Top Menu and then in the drop-down menu, select Show Clipboard, and you will be able to see your latest snap.
Capture a full screenshot and save it to your desktop
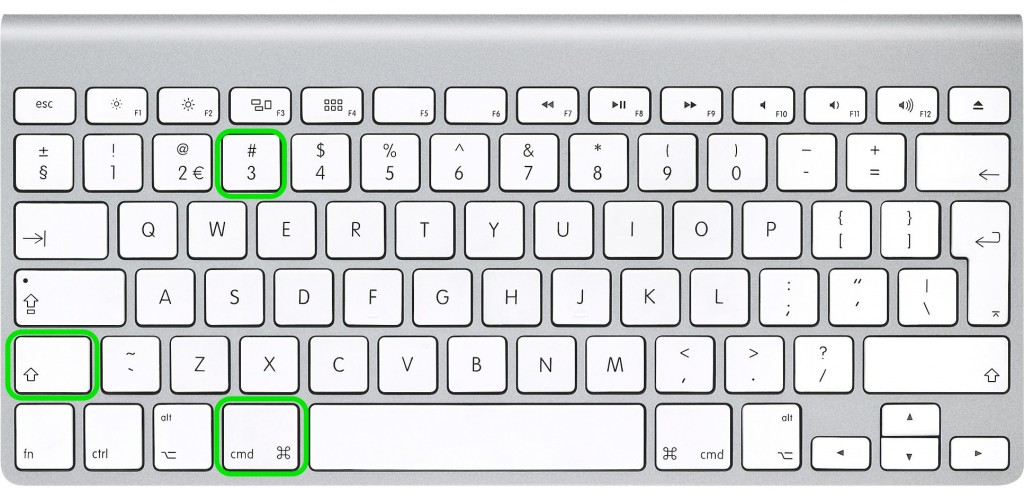
Command + Shift + 3
If you don't want the headache of searching for your screenshot, this method will save the screenshot directly to your desktop as an image file.
Advanced Functions (Selective Screenshots)
Option 1 - Creating screenshot selections to Clipboard
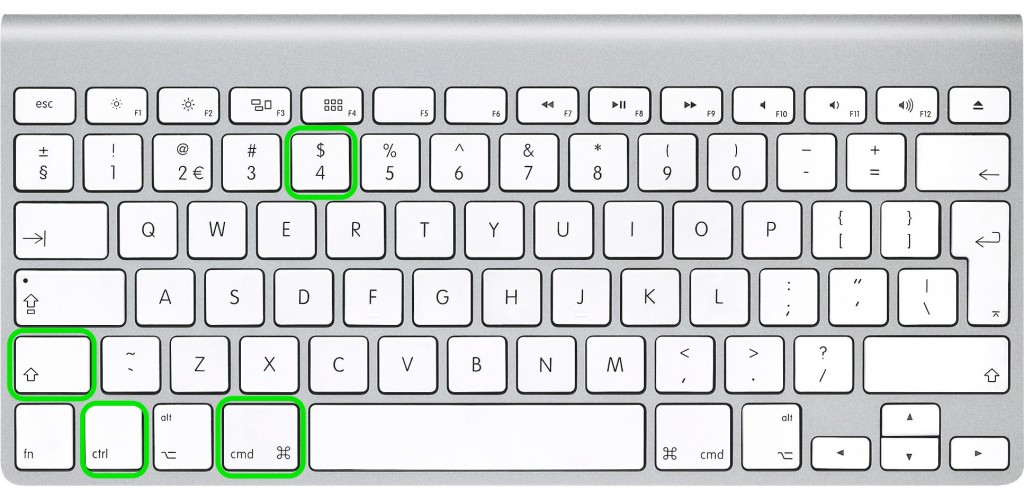
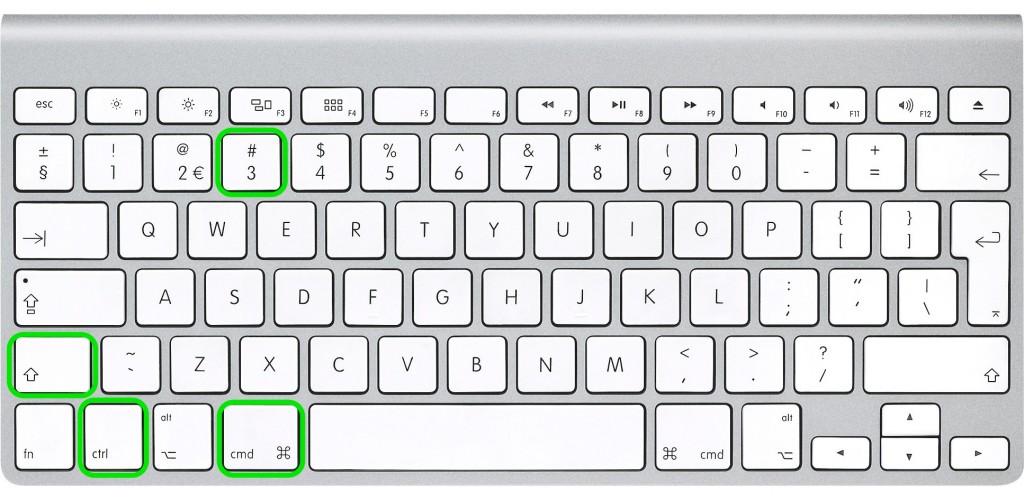
Command + Control + Shift + 4
This method will allow you to drag and select the part of the screen you wish to copy. Once you press the keys, your mouse cursor will turn to a "+" symbol, which you can then drag to the necessary size and area of the screen you want to save. The selection will be located in your Clipboard.
Option 2 - Creating a screenshot selection saved on the desktop
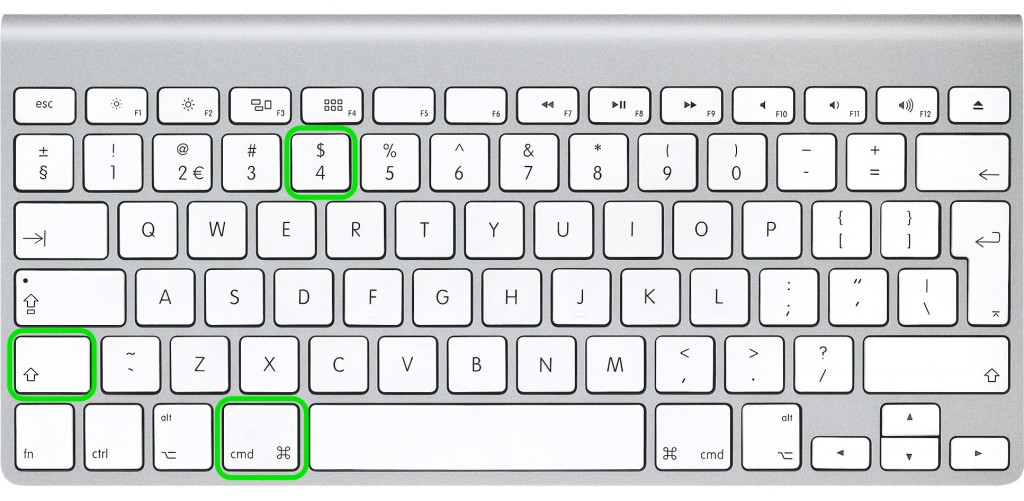
Command + Shift + 4
If you want to immediately save your selection for future use, you can use this function to have the selection be saved immediately to your desktop, or wherever you designated you want your Screenshots to be saved.
For more information, ColorLib is an incredible resource for all sorts of how-to guides, don't forget to check it out.
If you are still lost how to do it, then Apple Support's video will answer all your lingering questions for sure.
-
05
How to Screenshot in Ubuntu Linux
Ubuntu Linux is an alternative operating system that if you are reading this for knowledge, you should probably stick to Windows/Mac. But it is a versatile and relatively intuitive system to work with, until you want to actually do anything within the system. But at least for Screenshots, it is very similar to Windows.
There are 3 main keyboard functions:
PrtScn - Takes a screenshot of the entire desktop

Alt + PrtScn - Takes a screenshot of the current window

Shift + PrtScn - Takes a screenshot of a selected area

If using keyboard functions isn't your thing, there is a tool built into Ubuntu and other GNOME-based operating systems called the Screenshot Utility

Regardless, ALL of the photos will be saved by default in your Pictures folder.

If you are looking for even more methods to grab screenshots, WikiHow has all your answers and so much more.
-
06
And As A Last Resort
If all else fails, your computer is frozen, you're late to the airport, and you just need to make sure you have those pesky ticket codes ready to show. Fear not! You have a handy dandy device you haven't thought of. Just take a picture of the computer monitor with your phone. It might not hold up for a murder trial (maybe divorce court), but it will definitely give you the information or picture you need in a timely fashion. Or you can completely demolish your computer in a fit of senseless rage. The choice is entirely yours.
How To Screenshot On Any Device
I'm sure you're asking yourselves how you ended up here. How is it in 2019, its still rocket science to take a screenshot. Luckily, for those of you who simply don't know, or are trying a new device for the first time, we have a guide made just for you so you are screen capturing your ex's profile in no time.
Did you know? Screenshots have been around since the 1960s, but computers and their operating systems did not have a function to do so until the 1980s. Clearly no matter what the function, the tech industry is playing catch up with itself now and since its inception.
But if for some unknown reason you find yourself fascinated by the background and history of the screenshot/grab/cap, this TechSmith's quick rundown of the function will give you everything you are looking for. The screenshot is a seriously underrated function that we take for granted, and if you think about it, they fulfill so many functions in terms of information collection and troubleshooting. Its hard to imagine what we did without them, but I can tell you one thing: tech support used to be a whole lot harder.
Trending Now
HR accidentally sends entire company the results of employees' engagement survey, leading all employees to read through the unfiltered feedback: ‘There were very pointed remarks about management’
01
Employee is forced to talk to customer service bot instead of a person and ends up developing another bot to run up the company’s AI bill: 'Maybe they'll provide customer service now, instead of foisting the responsibility on a chatbot.'
02
Stairs to Nowhere and Other Bad Ideas: 26 Architecture Fails That Should've Stayed on Paper
03
21 Cooking Fails for Optimistic Home Chefs Learning to Trust the Process (June 10th, 2026)
04
30 Relaxing Pictures of Coastal Cats Catching Waves and Catnaps
05